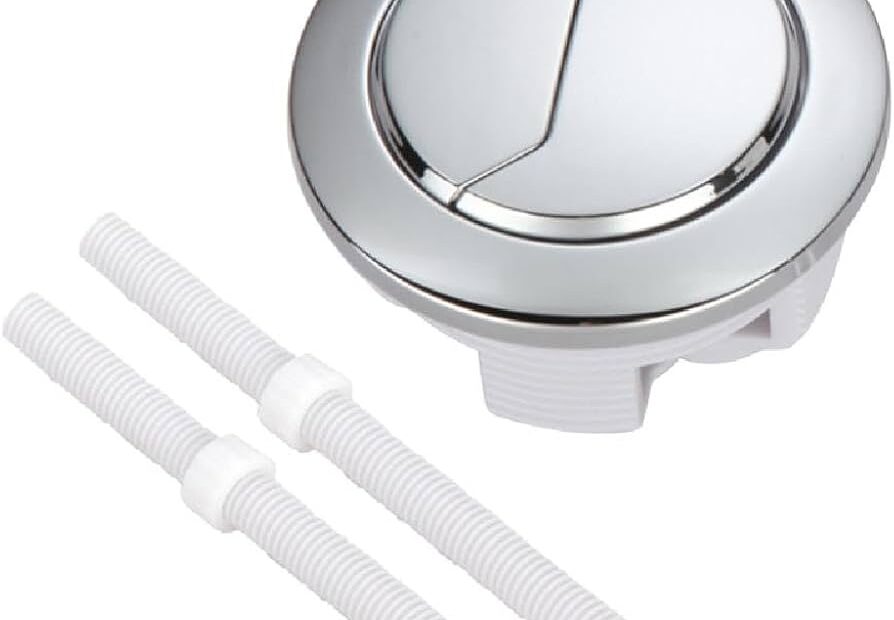
A malfunctioning toilet flush button can be a frustrating issue, but the good news is that it’s often a simple fix. Whether the button is sticking, not flushing, or has completely broken off, this guide will walk you through the process of diagnosing and repairing it. We’ll cover everything from the tools you need to step-by-step instructions for fixing or replacing the flush button.
Tools You’ll Need
Before starting, gather the necessary tools to make the repair process smoother:
- Screwdriver (Flathead or Phillips, depending on your toilet model)
- Adjustable wrench
- Plumber’s tape
- Replacement flush button (if needed)
- Towel or rag (to mop up any water spills)
- Bucket (optional, for draining water)
Step-by-Step Guide to Fixing a Toilet Flush Button
1. Turn Off the Water Supply
Locate the water shut-off valve near the base of your toilet. Turn it clockwise to stop water from flowing into the tank. This is crucial to avoid any flooding while you work on the toilet.
2. Remove the Cistern Lid
Carefully lift off the cistern lid and place it somewhere safe. Be cautious as cistern lids are often fragile and can crack if dropped.
3. Inspect the Flush Button Mechanism
Once inside, examine how the flush button connects to the flushing mechanism. Common issues include:
- Broken or disconnected linkages
- Sticking buttons due to debris
- Worn-out components
If you notice any of these problems, you may need to clean or replace parts.
4. Test the Flush Valve
Press down on the flush valve manually (without using the button). If it works fine, then your issue is likely with the button itself rather than the valve.
5. Remove and Replace the Flush Button
If your flush button is broken or worn out:
- Unscrew or unclip the old flush button from its mounting.
- Insert a new flush button into place.
- Tighten it securely using a wrench or screwdriver.
- Ensure that all linkages are properly connected.
6. Reconnect and Test
Once everything is in place, turn on the water supply and let the tank fill up. Test flush several times to ensure smooth operation.
Common Issues with Toilet Flush Buttons
1. Sticking Button
A sticky flush button can be caused by dirt or mineral buildup around its edges. Cleaning around the button with a mild detergent or vinegar solution can resolve this issue.
2. Broken Linkage
If pressing the button doesn’t trigger a flush, check if there’s a broken or disconnected linkage between the button and flush valve. Reconnecting or replacing this part should fix it.
3. Worn-Out Seal
The rubber seal inside the flush valve may wear out over time, causing leaks or incomplete flushing. Replacing this seal is an easy fix that can restore normal function.
Troubleshooting Table
| Problem | Possible Cause | Solution |
|---|---|---|
| Button doesn’t press down | Stuck due to debris | Clean around edges |
| Weak flush | Broken linkage | Reconnect linkage |
| Continuous running | Worn-out seal | Replace rubber seal |
| Water leaking | Faulty fill valve | Replace fill valve |
FAQs
1. How do I know if my toilet flush button needs replacing?
If your toilet doesn’t flush when you press the button or if it feels loose and unresponsive, it’s likely time for a replacement.
2. Can I fix a sticking flush button without replacing it?
Yes! Often, cleaning around the edges of a sticking button with vinegar or detergent will solve the problem.
3. What should I do if my toilet keeps running after flushing?
This could be due to a faulty flapper or fill valve inside your tank. Inspect these components and replace them if necessary.
4. Is it difficult to replace a toilet flush button myself?
Replacing a toilet flush button is generally an easy DIY task that requires minimal tools and effort.
5. Why does my toilet still leak after replacing parts?
If leaks persist after replacing components like seals or valves, double-check that all connections are tight and that no parts are damaged during installation.
Conclusion
Fixing a toilet flush button is an easy task that most homeowners can handle themselves with basic tools and some patience. By following this guide, you should be able to diagnose and repair common issues like sticking buttons, broken linkages, and worn-out seals without needing professional help.
If these steps don’t resolve your issue, consider consulting with a plumber for more complex problems like internal cracks in your tank or persistent leaks.
Citations:
[1] https://www.myjobquote.co.uk/how-to/fix-toilet-flush-button
[2] https://westernrooter.com/steps-to-replace-a-toilet-flush-valve-diy-guide/
[3] https://www.workshop.bunnings.com.au/t5/Bathroom-and-Laundry/How-to-replace-toiler-flush-button/td-p/213733
[4] https://my-plumber.co.uk/blog/how-to-change-a-push-button-toilet-flush/
[5] https://quintessentialplumbing.com.au/10-easy-steps-on-how-to-fix-the-toilet-flush-button/
[6] https://twc-draincare.com/how-to-fix-a-running-toilet-with-a-button-flush/
[7] https://www.wilcoplumbing.com.au/blog/my-toilet-button-isnt-flushing-what-can-i-do/
[8] https://www.checkatrade.com/blog/how-to/fix-toilet-flush-button/
[9] https://tapron.co.uk/blogs/news/how-to-fix-toilet-flush
