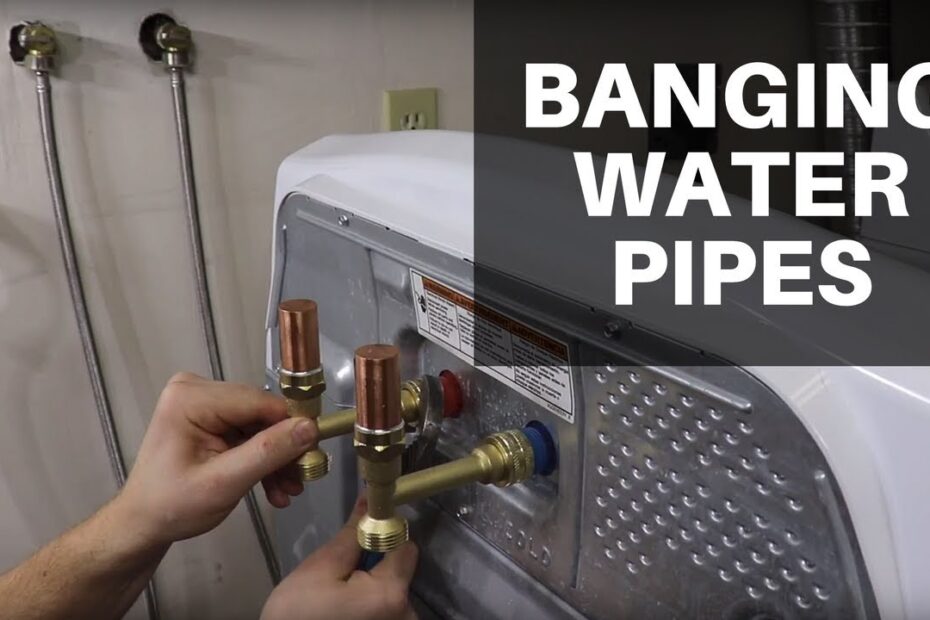
Water hammer is a common plumbing issue that causes loud banging noises when water flow suddenly stops in your washing machine. This phenomenon not only creates disruptive sounds but can potentially damage your plumbing system over time. Installing a water hammer arrestor is an effective DIY solution that can protect your pipes and restore peace to your laundry routine[1].
What is Water Hammer?
A water hammer occurs when flowing water abruptly changes direction or stops, creating pressure surges in your pipes. Water hammer arrestors contain an air cushion or spring mechanism that absorbs these shock waves, preventing the characteristic banging noise and protecting your plumbing system[2].
Required Tools and Materials
Before beginning the installation, gather these essential items:
- Water hammer arrestor compatible with your washing machine
- Adjustable wrench
- Plumber’s tape
- Bucket for water collection
- Clean towels
- Replacement supply lines (if needed)[2]
Installation Process
1. Preparation
Turn off both hot and cold water supply valves to the washing machine. Place a bucket and towels beneath the connection points to catch any residual water[2].
2. Disconnect Supply Lines
Carefully remove the existing supply lines from both the water valves and washing machine. This is an excellent opportunity to inspect the hoses for wear and tear, particularly around the crimp joints[3].
3. Install the Arrestors
- Check for rubber gaskets in the arrestor fittings
- Hand-tighten the arrestors onto the supply valves
- Use a wrench to give an additional quarter turn – avoid overtightening
- Ensure the arrestors are positioned vertically[2][3]
4. Reconnect Supply Lines
Reattach the water supply lines to both the arrestors and washing machine. Verify that the washers are properly seated in the swivel nuts before making connections[4].
Testing and Maintenance
Initial Testing
- Slowly turn the water supply back on
- Check all connections for leaks
- Run a short wash cycle to verify proper operation
- Listen for any unusual sounds
Long-term Maintenance
Inspect the installation every six months for:
- Signs of leakage
- Proper positioning
- Secure connections
- Effectiveness in noise reduction[1]
Troubleshooting Common Issues
| Problem | Possible Cause | Solution |
|---|---|---|
| Persistent noise | Incorrect installation | Verify arrestor position |
| Water leaks | Loose connections | Tighten fittings |
| Reduced effectiveness | Air cushion failure | Replace arrestor |
Key Takeaways
Installing a water hammer arrestor is a straightforward DIY project that can significantly improve your home’s plumbing system. Proper installation not only eliminates disruptive noises but also protects your pipes from potential damage caused by pressure surges[1].
Frequently Asked Questions
Q: How long do water hammer arrestors last?
Water hammer arrestors typically last 5-7 years under normal usage conditions. However, their lifespan can vary depending on water quality, pressure levels, and frequency of use.
Q: Can I install water hammer arrestors horizontally?
While vertical installation is preferred, some models can be installed horizontally. Always check the manufacturer’s specifications, as improper orientation may reduce effectiveness.
Q: Do I need an arrestor for both hot and cold water lines?
Yes, installing arrestors on both lines is recommended for optimal protection and noise reduction. Single-line installation may only partially solve the water hammer issue.
Q: Can water hammer damage my washing machine?
Yes, persistent water hammer can damage washing machine valves, internal components, and connected plumbing over time. Prevention through proper arrestor installation is crucial.
Q: What size water hammer arrestor do I need?
For standard residential washing machines, AA size arrestors are typically sufficient. However, check your machine’s specifications and local plumbing codes for specific requirements.
Q: Are water hammer arrestors required by code?
Many modern building codes require water hammer arrestors for quick-closing valves, including washing machines. Check your local regulations for specific requirements.
Professional Tips
- Regular Inspection: Check connections quarterly for optimal performance
- Replacement Schedule: Mark installation date and plan replacement every 5-7 years
- Documentation: Keep product manuals and warranty information accessible
- Water Pressure: Monitor household water pressure to prevent premature wear
Safety Considerations
- Never exceed maximum pressure ratings
- Avoid using pipe dope or liquid sealants
- Keep installation area well-ventilated
- Consider professional installation if unsure
Citations:
[1] https://www.surgex.net/post/how-to-install-a-water-hammer-arrestor-a-step-by-step-guide
[2] https://www.oatey.com/resources/project-guides/how-install-hammer-arrestors
[3] https://www.youtube.com/watch?v=aMd7bQ8kkj8
[4] http://water-hammer-arrestor.com/mobile/news_view.php?id=34
